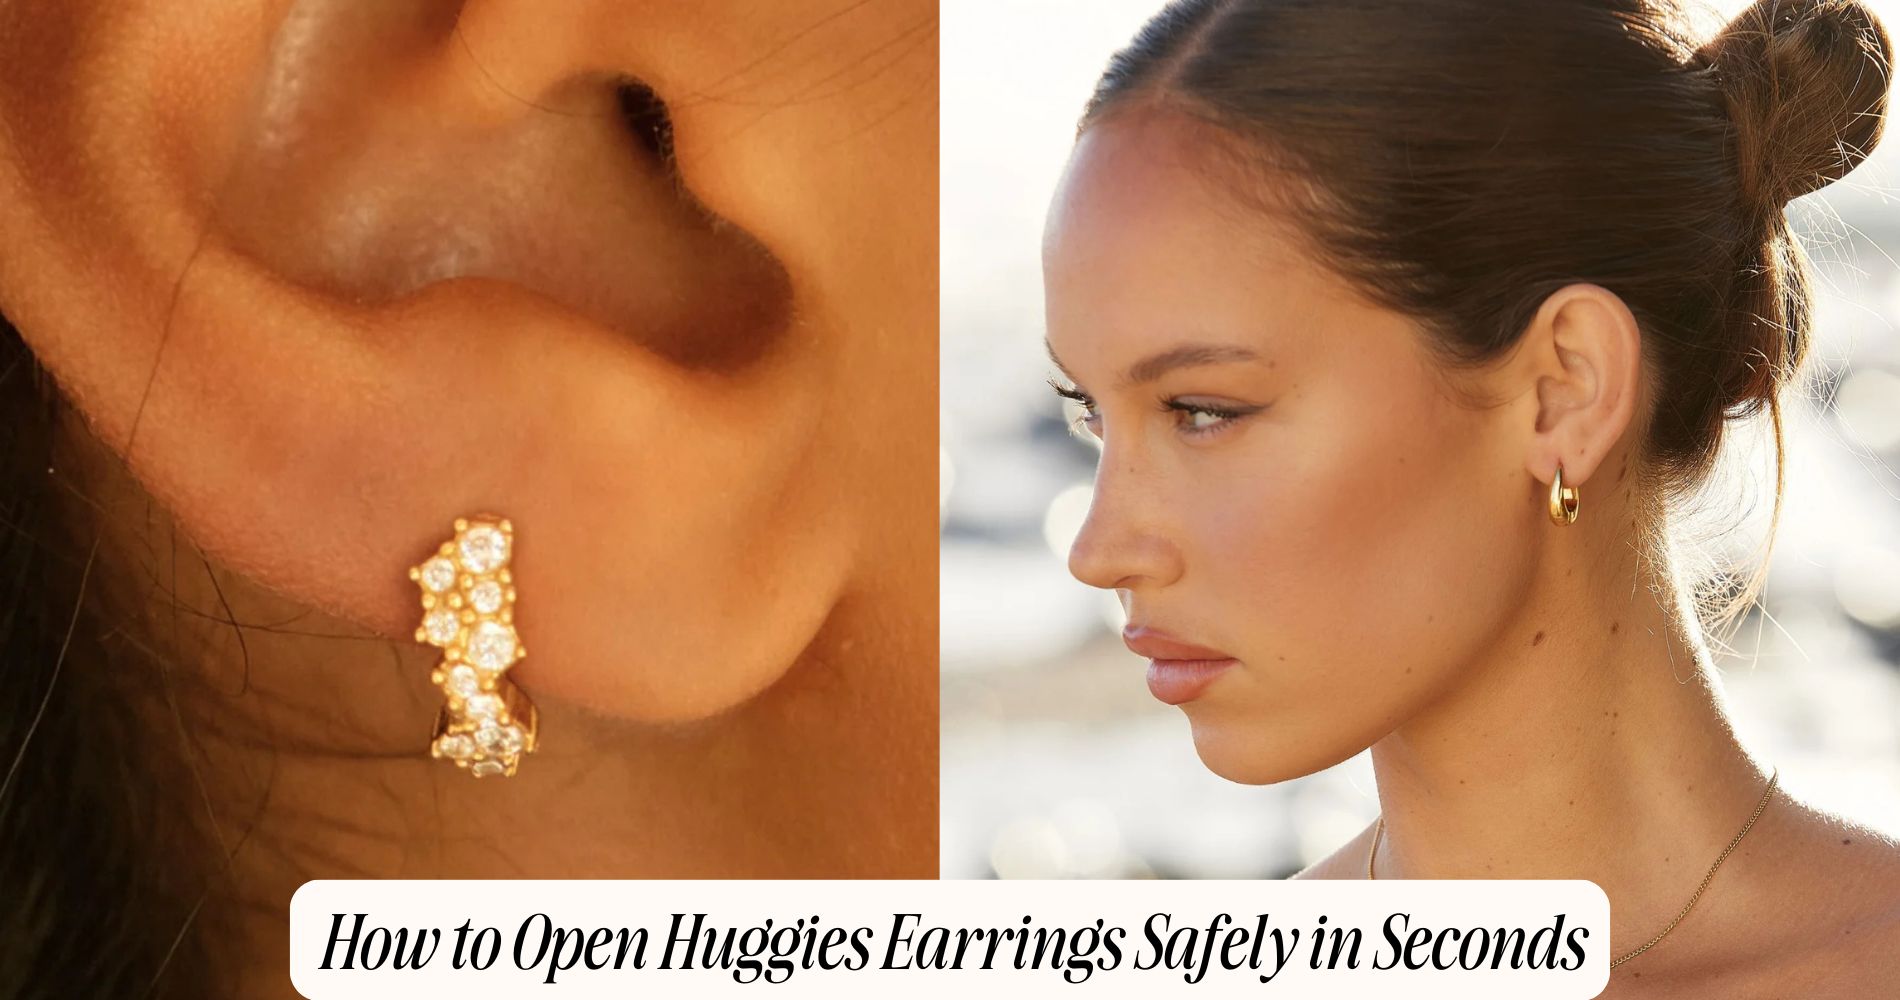
How to Open Huggies Earrings Safely in Seconds
Learning how to open huggies earrings the right way can keep them secure and long-lasting. Start by locating the seam—rotate the hoop until you spot a straight line and feel a slight ridge. Stabilize the hinge with your thumb, then gently pinch on both sides of the seam to lift the post straight out of the catch—avoid twisting. If it resists, realign and try again using a trimmed nail or a lint-free cloth for better grip. Once open, check the hinge and alignment. Proper care helps maintain their shape—and there’s more to keep your huggies smooth and secure with Atolea’s Waterproof Earrings.
Understand the Parts: Hinge, Post, and Catch
Anatomy matters. You’ll open Huggies safely when you understand their three elements: hinge, post, and catch.
Assess hinge mechanics first. The hinge forms the fulcrum that lets the hoop articulate; it should pivot smoothly without lateral wobble. Identify the seam—this marks the opening line.
Next, examine post function. The post is a slim, rigid arm that engages the catch; it should be straight, free of burrs, and aligned with the receiving slot. Test light axial pressure to confirm spring tension, not force.

Finally, locate the catch. It’s a notch or box that locks the post audibly. Check for positive detent and snug retention.
When opening, direct force along the hinge axis and disengage the post from the catch deliberately, minimizing torque.
Prep Your Hands and Workspace
Two minutes of preparation prevents slips and contamination. Wash your hands with soap and warm water for 20 seconds, rinse thoroughly, and dry with a clean towel. If available, use an alcohol-based sanitizer to complete hand hygiene. Remove lotions or oils that reduce grip. Trim or file nails if edges are rough, and tie back hair to avoid accidental snags.
Set up strict workspace organization. Choose a clean, well-lit surface with a light-colored towel or tray to catch small pieces. Disinfect the surface with an alcohol wipe and allow it to air-dry.
Keep cotton swabs, alcohol wipes, and a soft microfiber cloth within reach. Eliminate clutter, pets, and drafts. Sit with forearms supported to stabilize movements. Put on non-powdered nitrile gloves if your skin is sensitive.
Identify the Seam and Hinge Before You Pull
With clean hands and a stable setup, inspect the hoop closely under bright light.
Begin seam identification by rotating the earring slowly and locating the hairline break where the two halves meet. The seam is a precise, straight line; it won’t follow decorative curves. Confirm by touching it with a fingernail—true seams feel like a slight ridge, not a scratch.
Next, identify the hinge mechanics. Look for a tiny pivot barrel or recessed notch on the opposite side of the seam. The hinge appears as a compact cylinder or paired tabs integrated into the hoop’s inner edge.
Verify orientation: hinge at one side, clasp at the seam. Map these points mentally. If unclear, switch angles, use magnification, and eliminate glare until components are unmistakable.
The Gentle Pinch-and-Lift Method
A gentle pinch-and-lift opens most huggies without stressing the hinge. Position clean, dry fingers on either side of the seam you identified earlier. Stabilize the hinge with your thumb to prevent torsion.
Apply minimal pressure: pinch the front segment toward the hinge, then lift the post upward in a small arc. You’re directing movement along the clasp’s intended pathway, not prying sideways.

Use gentle techniques to maintain safe handling. If you feel resistance, stop and reset your grip; misalignment indicates you’re off the track.
Keep motions small and controlled—millimeters, not centimeters. Once the click releases, let the hoop relax open; don’t overextend. Inspect the post and notch for debris, then close and reopen to confirm smooth travel.
Repeat on the second earring using identical control.
How to Open With a Nail Instead of Tools
Although you don’t have tools, you can use a trimmed, clean thumbnail to trigger the clasp precisely. Stabilize the hoop with your non-dominant hand.
With your dominant hand, position the nail edge at the hinge seam or tab. Apply controlled, linear pressure toward the clasp’s release point; don’t twist. When you feel the click lessen, stop and guide the post away from the latch.
Use this nail technique only on intact hinges and posts. If the clasp resists, reassess positioning rather than increasing force.
Safety tips: sanitize your nail and earring first, keep nails short to prevent slipping, and avoid prying motions that can deform the hoop.
If you experience pain, swelling, or snagging, halt immediately and consult a jeweler before attempting again.
Using a Soft Cloth for Better Grip
Friction matters. Wrap a clean, lint-free cloth around the huggie before you open it. The soft texture increases contact with the metal, reducing slip and giving you better control without scratching the finish.
Position your thumb and index finger close to the hinge and post. Stabilize the hoop with one hand, then apply steady, opposing pressure with the other to separate the clasp. Keep your movements small and linear; avoid twisting that can misalign the hinge.

Choose a tightly woven microfiber or cotton polishing cloth. Make sure it’s dry; moisture reduces grip. Fold it once to add cushion without bulk, maintaining tactile feedback. Re-grip as needed to sustain consistent pressure.
When the clasp releases, maintain support so the hoop doesn’t snap shut or drop.
What to Do If the Clasp Feels Stuck
If the clasp resists gentle pressure, stop and assess before forcing it. Stabilize the hoop between thumb and forefinger. Inspect the hinge and notch under bright light for misalignment, debris, or bent metal.
Begin clasp troubleshooting by cleaning: moisten a cotton swab with isopropyl alcohol, wick away residue from the latch and post, then dry thoroughly. Apply a micro‑drop of mineral oil to the hinge only; avoid the notch to prevent slippage.
Test movement with incremental pressure toward the natural opening path. If it still binds, check for hair caught in the hinge and remove with tweezers.
Evaluate for play: excessive wobble indicates a worn hinge; resistance with perfect alignment suggests burrs. As part of earring maintenance, store Huggies closed, and schedule professional adjustment when misalignment persists.
Avoid These Common Mistakes
Common pitfalls undermine both safety and hardware integrity.
Don’t pry the hinge open with nails or tools; you’ll deform the saddle and misalign the post. Avoid twisting the hoop laterally—rotate along the hinge’s intended axis only.
Never pull on charms or stones; you’ll loosen settings. Skip lotions or oils right before opening; lubricants reduce grip and can send the clasp snapping unpredictably.
Ignore magnetism myths; most Huggies aren’t magnetic, so don’t force a “magnetic” release. Don’t overextend the hinge; open just enough to clear the lobe.
Avoid gripping near the latch tip; hold the thicker hinge side for control. Resist rushing; precision prevents slippage.
Apply these safety tips: align motions, use light, steady pressure, and stop at the first sign of resistance to avoid cumulative damage.
Quick Checks Before Snapping It Closed
Two quick checks protect your ears and the clasp. First, confirm alignment: guide the post directly toward the latch channel and verify it meets the groove without resistance. If you feel drag, stop, realign, and try again.
Second, assess tissue clearance: make certain the earring sits flush against the lobe with no skin pinched between hinge and hoop.
Run fast safety checks: inspect the hinge for free movement and the latch for a clean, burr‑free edge. Lightly tap the closure once to test engagement before committing to a firm snap.
Use efficient techniques: stabilize the hoop with your non‑dominant hand, advance the post with controlled pressure, and listen for a crisp click. If the sound is dull or absent, pause and reassess alignment.
Care Tips to Keep the Hinge Smooth and Secure
Snap checks only work when the hardware stays reliable, so maintain the hinge and latch with routine care.
After each wear, wipe the earring with a lint-free cloth to remove oils that impede hinge maintenance and clasp security.
Weekly, inspect the pivot: open and close it three times to confirm smooth travel and a crisp click. If movement feels gritty, apply a microdrop of jewelry-safe lubricant to the hinge pin, then cycle it and blot excess.

Keep earrings dry. Remove them before showers, workouts, and swimming; moisture corrodes springs and weakens tension.
Store each pair latched in a padded compartment to prevent bending. Avoid ultrasonic cleaners on delicate mechanisms; use mild soap, water, and a soft brush instead.
Seek professional adjustment if alignment drifts.
Frequently Asked Questions
Can Huggie Clasps Trigger Metal Allergies or Skin Irritation?
Yes. Huggie clasps containing nickel or cobalt can trigger metal allergy symptoms and dermatitis. Choose hypoallergenic metals, clean earrings, and limit wear. If reactions occur, remove them, apply skin irritation remedies like hydrocortisone, and consult dermatology for patch testing and guidance.
Are Huggies Safe to Open on Newly Pierced Ears?
Yes, but only after the initial healing period. You should avoid manipulating fresh piercings. Once healed, open them gently to preserve tissue integrity. Choose medical-grade metals for huggies comfort, verify hinge tension for huggies durability, and disinfect thoroughly.
How Do I Open Huggies With Long Acrylic Nails?
Use a silicone fingertip or nitrile glove for grip, stabilize the hoop, then pinch the hinge and gently pull apart. Avoid prying with nails. Follow nail safety tips, clean tools, moisturize cuticles, and prioritize acrylic maintenance to prevent lifting.
Do Different Brands Use Different Clasp Tensions?
Yes. Different brands use different clasp tensions due to clasp design tolerances, hinge mechanics, and materials. You’ll notice tighter snaps or softer clicks across a brand comparison. Test closure force, inspect alignment, and choose consistent, comfortable engagement.
Can I Travel With Huggies Fastened Through Airport Security?
Yes, you can keep huggies fastened through airport security. Most metal detectors permit small jewelry. For airport security travel tips: use non-magnetic metals, avoid oversized hoops, disclose implants, remove only if requested, and store earrings in a pouch if asked.
Conclusion
You’ve got the technique: locate the seam, stabilize the hoop, and use a controlled pinch-and-lift to open. If needed, use a nail to separate the catch, never force it. If it sticks, apply gentle wiggle, warm water, or a dab of oil. Avoid twisting, prying with tools, or snapping shut blindly. Before closing, align the post precisely and feel for a clean click. Maintain hinges with periodic cleaning and light lubricant. With practice, you’ll open Huggies safely in seconds.


Leave a comment
This site is protected by hCaptcha and the hCaptcha Privacy Policy and Terms of Service apply.